Weather Stations
Weather stations on the SnowObs map uses data from Synoptic, SNOTEL or your own stations to feed directly into the daily workflow. You’ll see station data used in:
- All Stations: A complete list of every station you track.
- Auto Stations: Populate the DailyObs forms for a given ObsLocation based on weather station data.
- Forecasts: Incorporate station data into avalanche hazard assessments.
General Weather Settings
The General Weather settings determine how station data appears and behaves in SnowObs.
To access these settings:
Navigate to Settings > General > Weather.
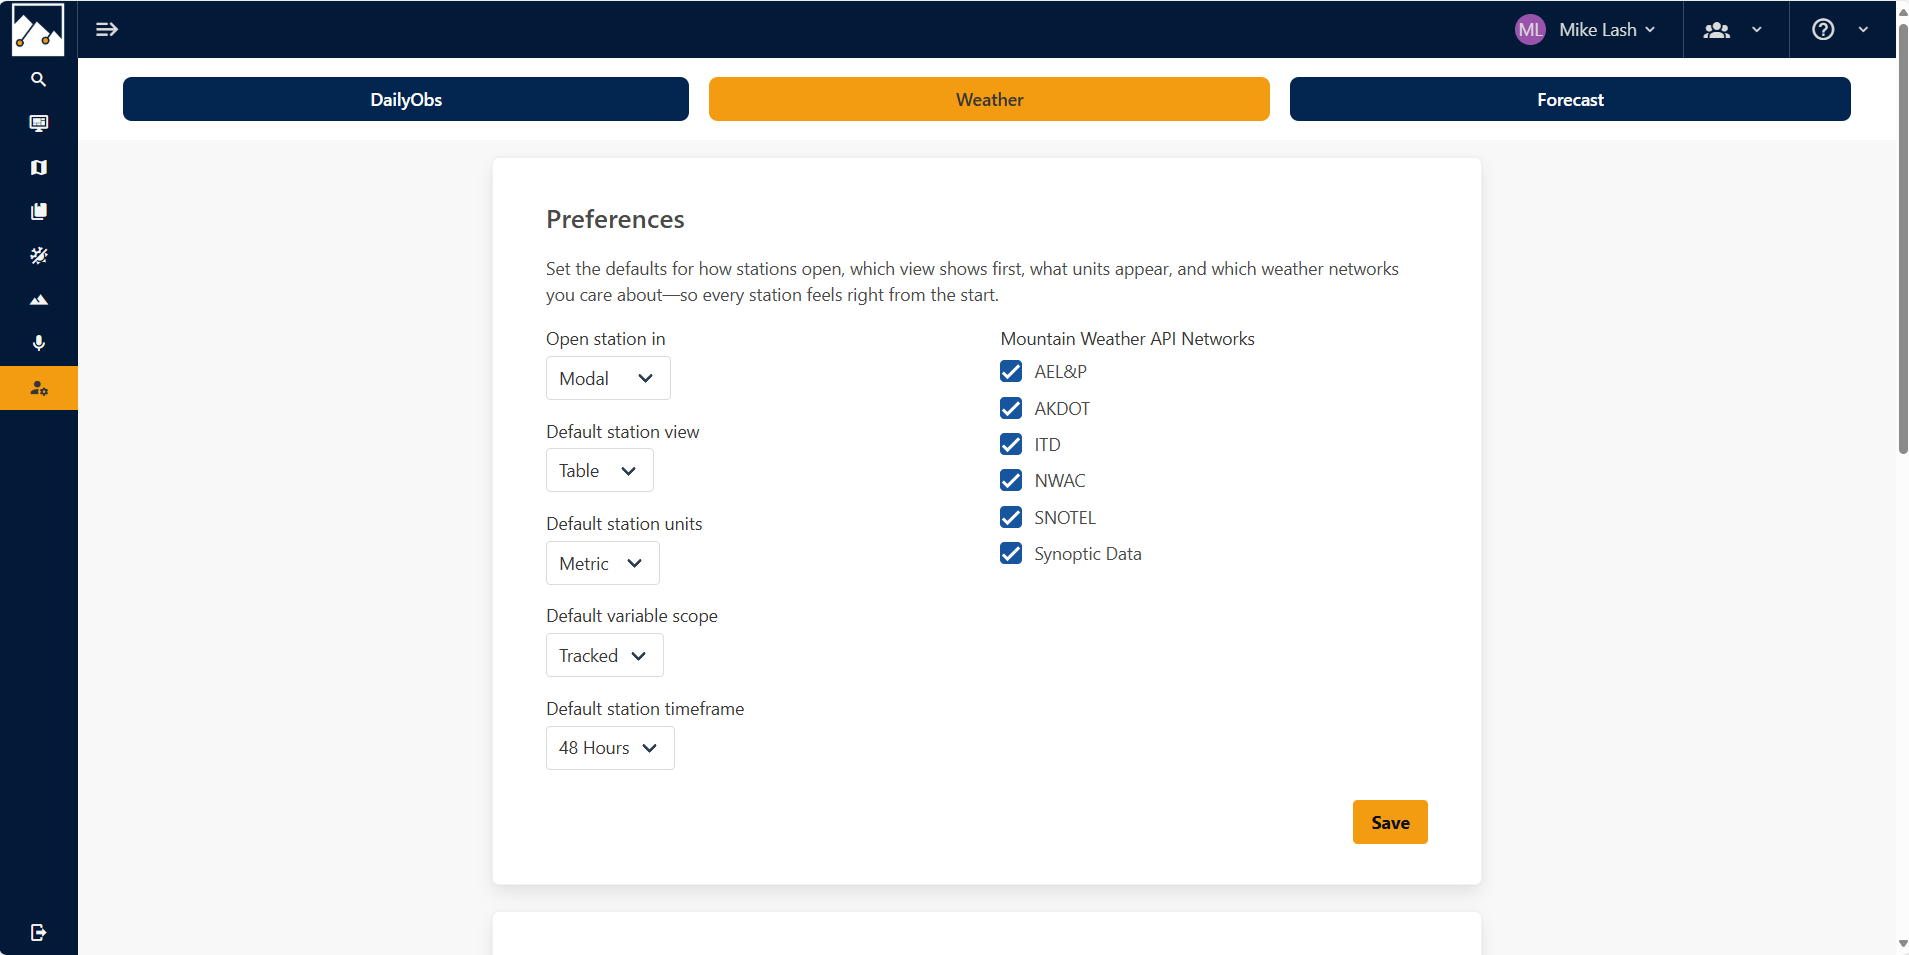
Preferences
Use the dropdown menus to select and set the defaults for the station:
- Open Mode: Modal or New Tab.
- Station View: Table or Charts.
- Station Units: English or Metric.
- Variable Scope: All or only Tracked variables.
- Timeframe: Default span of data shown on load.
Mountain Weather API Networks
Select which Mountain Weather API networks SnowObs uses. Synoptic and SNOTEL are the default stations with other networks focused on specific user's data.
- Click inside the box next to each API network you wish to use.
- Click the Save button to save your settings.
Tracked Variables
Tracked Variables lets you pick exactly which station measurements appear in SnowObs and how they’re labeled and formatted. Adjusting these settings removes unneeded variables, applies your naming and unit conventions, and ensures consistency wherever weather data appears—whether in weather charts, AutoStations, DailyObs reports, or any other feature that uses station data.
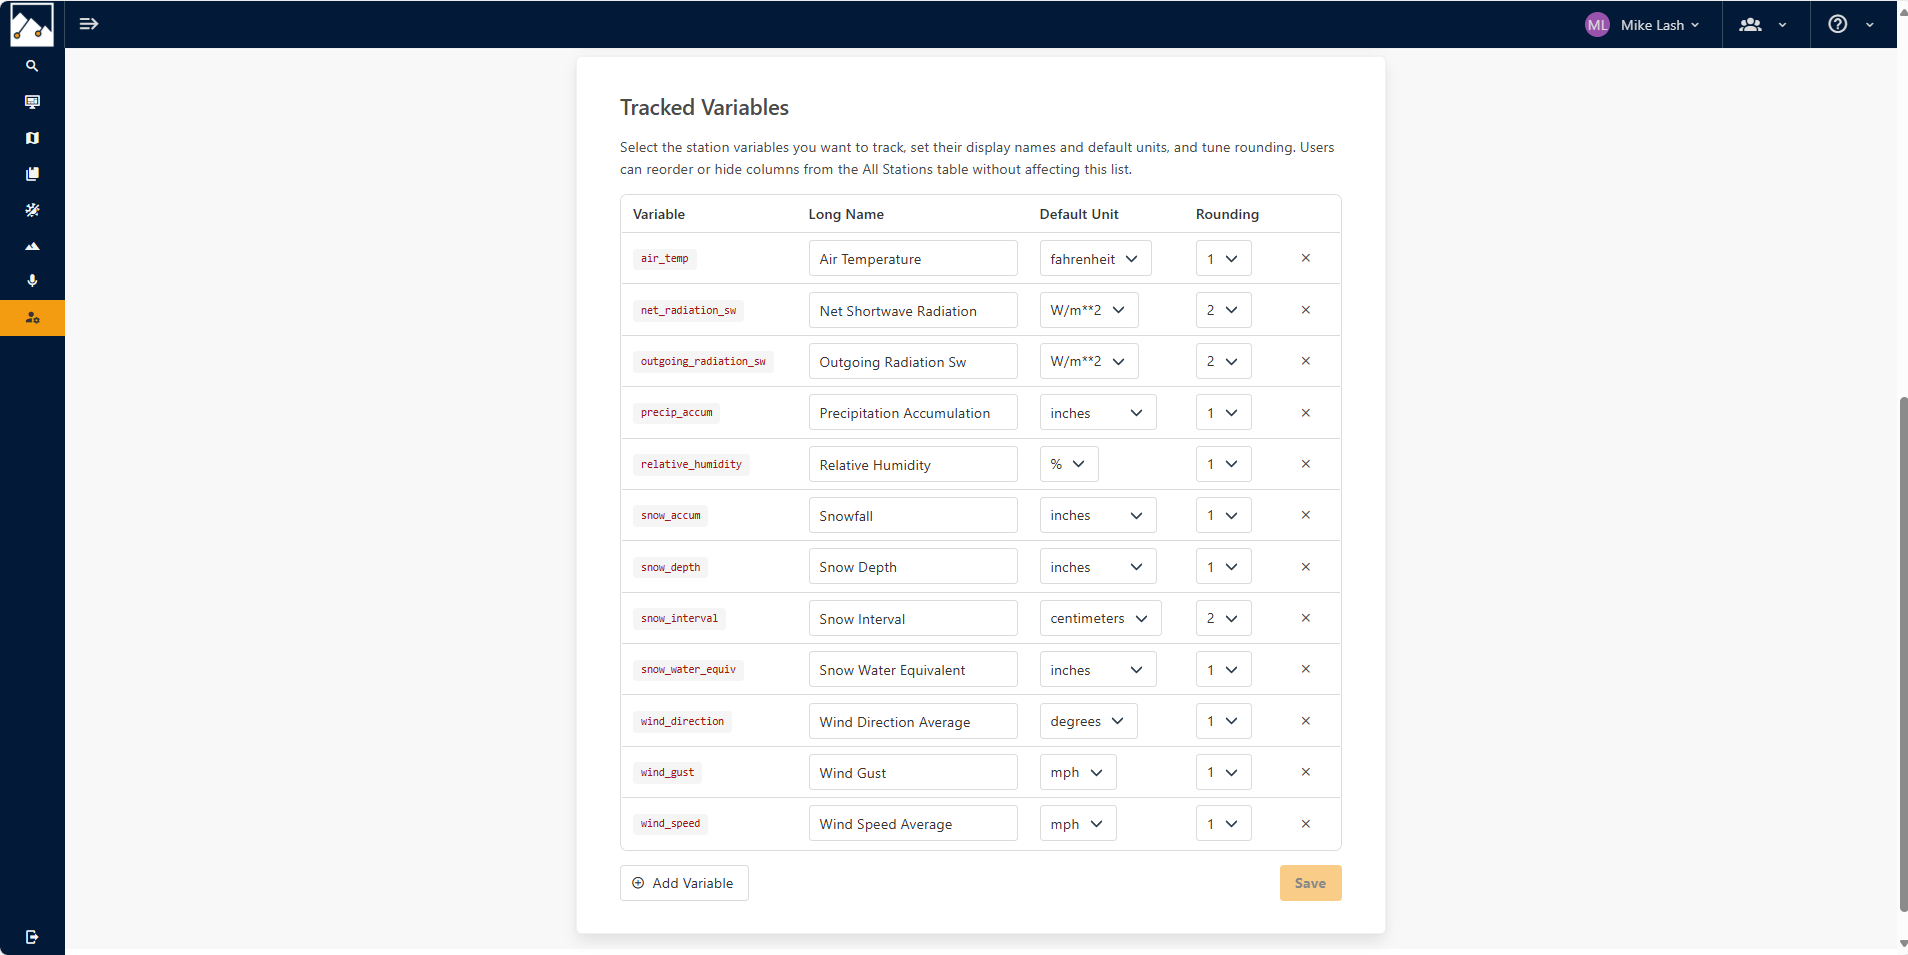
To configure tracked variables:
- Click Add Variable
- Select which variables to add from the modal by either clicking the row or the plus button
- This will show which networks the variable covers
- Hit Add Variables at the bottom to add the variables to the list
- Once added, you can set the following for each variable:
- Long Name The displayed name on plots (e.g., “Air Temp” instead of “Temperature”)
- Default unit is the unit to shown by default. This can be converted to english or metric while viewing the data.
- Rounding The number of decimal places to round the data to
- Click Save.
Add Stations to Map
After configuring your general weather settings, you can add weather stations to your map by searching and selecting from existing Mountain Weather API sources.
Add stations to map:
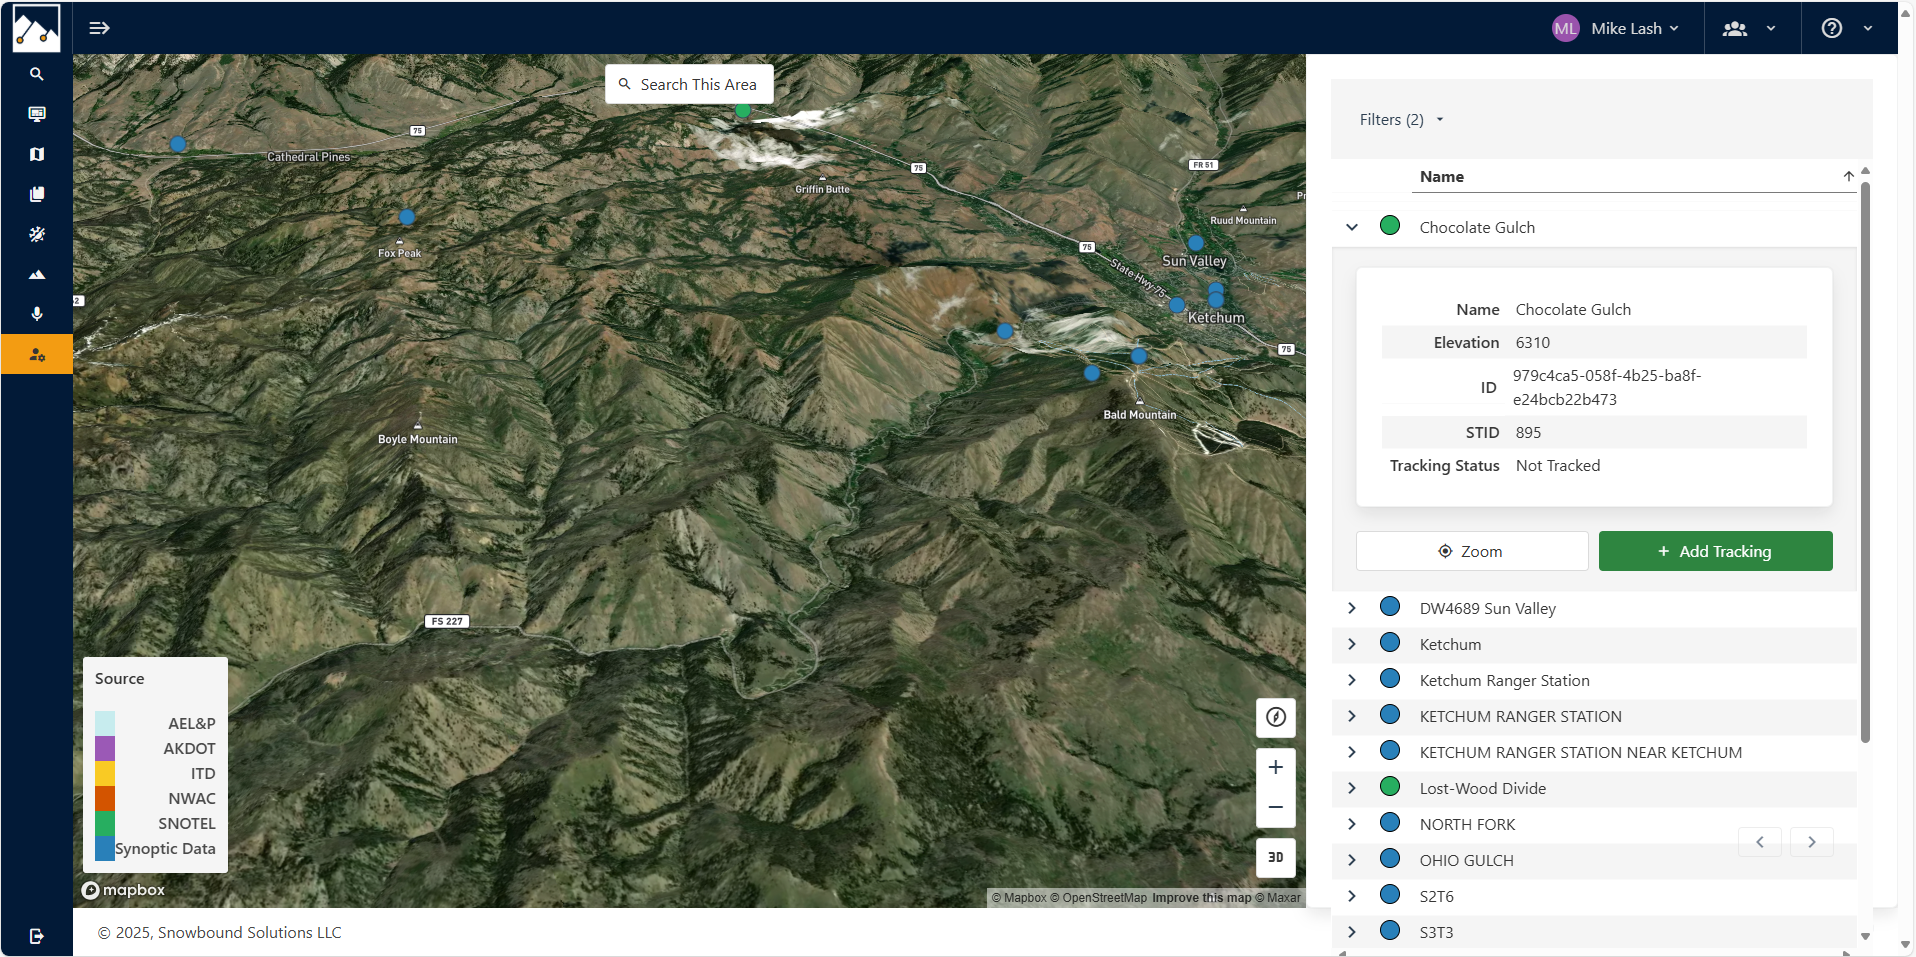
- Using the Navigation menu: Go to Settings > Stations.
- Navigate to the desired area on the base map using the map controls.
- Click Search This Area if the map has been moved or to refresh the station search.
Check out the video below.
- When weather stations appear on the map, hover over the station of interest and then click to select it for tracking.
- Stations can also be filtered on the right column by name or station id and added from the station card.
Note
Newly added stations may take 5 to 15 minutes to show as data is retrieved.
Viewing Added Stations: The All Stations Page
After successfully adding a new station, the All Stations page provides a centralized hub to view and manage all your integrated weather data in tabular form. This comprehensive table presents key variables (such as temperature, humidity, wind speed, and precipitation) from every station, allowing for quick comparisons and a broad overview of conditions across your operational areas. The table columns are linked to the tracked variables and the column changes are cached for each user.
To access this view:
- Using the navigation menu: Go to Weather > All Stations.
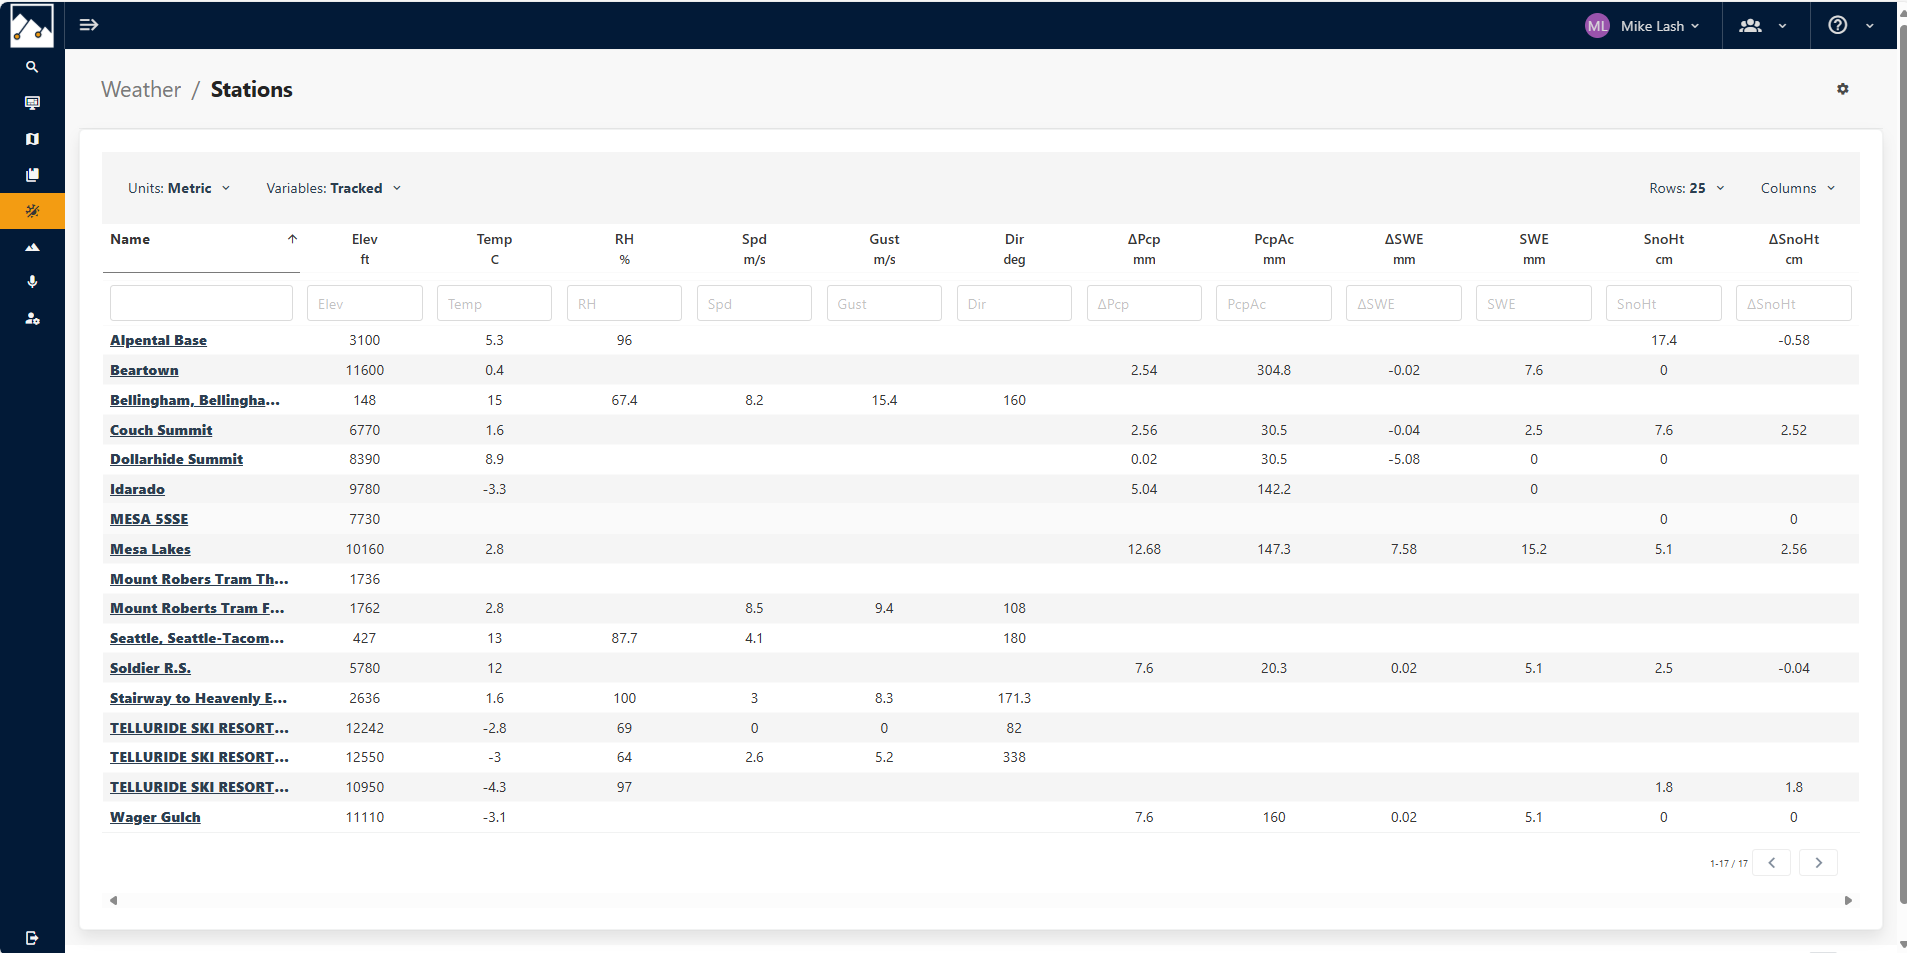
- On the All Stations page, you can reorder or hide columns for your stations without affecting the Tracked Variables list.